Why Faucet Aerators Clog With Sediment & How to Fix It
Discover why faucet aerators clog with mineral sediment, rust, and debris, how to diagnose the issue, and safe steps to clean or replace them.


Understanding Faucet Aerator Sediment Buildup
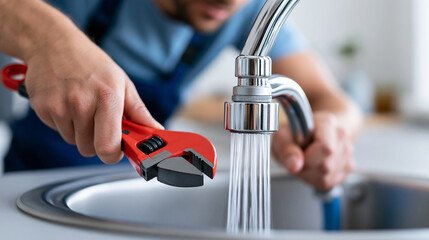
If you turn on a bathroom or kitchen sink and notice the water spraying sideways, trickling unevenly, or dropping in pressure while neighboring fixtures flow normally, the culprit is almost always a clogged faucet aerator. Located at the very tip of the spout, this small threaded nozzle mixes air into the water stream to provide a smooth, splash-free flow while conserving water.
Unfortunately, because it acts as the final filtration point before water leaves the pipe, it frequently traps small particles. In many Miami homes and properties across South Florida, this issue can happen repeatedly due to local water conditions, aging galvanized supply lines, or minor disturbances in municipal water mains. Understanding what causes this debris to accumulate helps you distinguish a simple fixture-level restriction from a larger plumbing problem.
What Causes Sediment to Trap in Aerators?
An aerator contains a series of fine mesh screens and internal disks. When water flows through, any suspended solid matter larger than the mesh openings gets trapped. The primary materials found clogging these screens include:
- Calcium and Mineral Scale: Hard water minerals precipitate out of solution, especially when water sits idle or gets heated, forming crusty white or yellowish deposits.
- Pipe Corrosion Fragments: In older residential properties or buildings with aging interior plumbing, flakes of rust or oxidized metal detach from galvanized steel or iron pipes.
- Municipal Main Disturbances: Utility work, fire hydrant use, or sudden pressure shifts in city water mains can dislodge mineral buildup in municipal supply pipes, sending silt and fine gravel straight into home service lines.
- Water Heater Degradation: As water storage tanks age, sediment accumulates at the bottom. If the tank is flushed or shaken during heavy usage, loose sediment can travel through hot water lines and clog hot-water-side aerators.
Diagnostic Clues: Is It Just the Aerator?
Plumbing diagnostics rely heavily on isolating symptoms. Before replacing parts or tearing into plumbing lines, a few quick observations can confirm whether the aerator is the true source of the problem:
- The Single-Fixture Test: If only one faucet exhibits low pressure or a distorted spray pattern while the hot and cold sides of adjacent sinks flow normally, the restriction is localized at that specific aerator.
- Hot vs. Cold Discrepancies: If only the hot water side spits debris, the issue often points toward sediment originating inside the water heater or localized pipe scaling near the water heater connection.
- The Screen Inspection: Unscrewing the aerator tip provides immediate visual proof. If the mesh is packed with dark grit, white crust, or tiny rubber fragments from deteriorating supply line gaskets, the diagnosis is confirmed.
If multiple fixtures throughout the property simultaneously lose pressure or spit debris, the restriction is likely located further upstream—such as at a main water shut-off valve, a whole-house water filter, or within the municipal service line.
Safe Homeowner Steps to Clean or Replace an Aerator
Cleaning a clogged aerator is one of the most straightforward maintenance tasks a homeowner can perform without professional assistance. It requires no specialized tools and takes only a few minutes.
- Preparing the Sink:
- Place a small towel over the sink drain to catch any tiny internal parts, such as rubber washers or mixing disks, should they slip out. Unscrewing the Aerator:
- Grip the aerator housing at the tip of the spout and turn it counterclockwise. Many modern fixtures feature coin-slot aerators or cache aerators that require a specialized plastic key included with the fixture. If the housing is tight due to mineral scale, wrap a piece of rubber or a cloth around it and use tongue-and-groove pliers gently to avoid scratching the finish. Disassembling and Inspecting:
- Separate the internal components—the metal or plastic housing, rubber washer, wire mesh screens, and flow restrictor disk. Note the exact stack order so reassembly is correct. Removing Mineral Scale:
- If the screens are caked with white mineral deposits, submerge them in a small cup of white vinegar for 15 to 30 minutes. The acid in the vinegar dissolves calcium carbonate without harming brass or plastic parts. For stubborn debris, gently scrub the mesh with an old toothbrush. Rinsing and Reinstalling:
- Rinse the components thoroughly under running water, reassemble the stack in its proper order, and screw the aerator back onto the faucet spout hand-tight.
When Cleaning Fails to Fix the Problem
If you clean or replace the aerator screen and the water flow remains weak or sputtering, the blockage has moved past the spout tip. Common hidden causes include:
- Debris Trapped in the Cartridge: Sediment can bypass the aerator or enter during disassembly, lodging inside the ceramic disk cartridge or mixing valve of a single-handle faucet.
- Supply Line Inlets: Flexible braided supply hoses connect the wall shut-off valves to the faucet. If fine sediment accumulates inside the tiny mesh screens built into the supply line connectors beneath the sink, flow will remain restricted.
- Debris in Shut-Off Valves: Angle stop valves under the sink can accumulate grit around the internal gate or ball mechanism when turned off and back on during maintenance.
Attempting to dismantle internal mixing cartridges or corroded supply valves in older properties requires care, as brittle metal threads can strip or crack, turning a minor cleaning job into an active water leak.
Cost Factors for Faucet and Supply Repairs
While DIY aerator cleaning costs practically nothing beyond a splash of vinegar, professional intervention may be required if supply lines or internal mixing valves are compromised. When evaluating professional plumbing service costs for faucet and supply issues, several variables apply:
- Access Limitations: Tight spaces beneath pedestal sinks, vanities, or commercial counter assemblies increase labor time.
- Corrosion and Age: Rusted or seized supply connections on older fixtures often require cutting, specialized extraction tools, or complete replacement of the supply lines and angle stops.
- Fixture Design: High-end designer faucets, electronic touchless models, or wall-mounted commercial configurations feature complex proprietary components that require specialized replacement parts rather than standard hardware store fixes.
- Diagnostic vs. Repair Scope: A standard service call typically covers diagnosis, but if multiple fixtures across a property are clogging simultaneously due to widespread scale or water heater breakdown, the repair scope expands to system-wide flushing or filtration maintenance.
Frequently Asked Questions
How often should I clean my faucet aerators?
In areas with hard water or older plumbing infrastructure, inspecting and cleaning aerators every six months prevents heavy mineral buildup. If you notice a sudden drop in spray quality or sideways sputtering, clean them immediately regardless of your maintenance schedule.
Can I run a faucet without the aerator attached?
Yes, you can temporarily unscrew and remove the aerator to test water pressure or flush out loose debris from the line. However, running the faucet long-term without an aerator will cause the water stream to splash uncontrollably and increase water consumption.
Why does my aerator keep clogging with black rubber bits?
Tiny black flecks usually indicate that flexible rubber washers, supply hose gaskets, or internal O-rings are degrading due to age, chemical exposure, or chloramines in the water supply. Replacing the deteriorating hose or gasket stops these particles from traveling to the spout.
Does sediment in my faucet aerator mean my water heater is failing?
Not necessarily. While a deteriorating water heater can release sediment into hot water lines, cold water lines also develop aerator clogs from municipal main activity or aging home water pipes. Check whether the sediment appears on both hot and cold settings to determine the source.
What should I do if the aerator is completely stuck and won't unscrew?
If mineral scale has cemented the aerator to the spout, avoid applying excessive force with metal pliers, which can crush or crack the spout housing. Wrap the collar in a vinegar-soaked cloth for an hour to dissolve the outer crust before attempting to twist it off gently.